


)
Instructions: Installing LED spotlights
How to install and connect successfullyModern LED recessed spotlights impress with their high energy efficiency, long service life and flexible application options, ranging from targeted area lighting to complete room lighting. This makes them just as useful as a replacement for conventional halogen light sources in an existing lighting system as in a more or less extensive renovation.
Important note: Work on the 230-volt mains supply should always be carried out by an electrician. Particularly in damp rooms such as the bathroom, it is also important to always ensure the appropriate IP protection rating and take the protection zones into account. If there are any uncertainties, a qualified electrician should be consulted during the planning phase.
Planning before installation
Recessed spotlight or surface-mounted spotlight?Well thought-out planning is crucial for a functional lighting concept that is convincing in everyday life.
)
If you want to install recessed spotlights, you need sufficient space in the ceiling. A suspended plasterboard ceiling is ideal for this. The available space in the ceiling also determines the installation depth of the LED spotlights.
)
If there is no corresponding cavity, surface-mounted spotlights are the right choice. These are installed like normal ceiling lights, which is why a corresponding number of electrical connections are required in the ceiling.
Good planning is important for both types of LED spotlights. The decisive factor is always the purpose for which the lighting is to be used later.
)
Uniform distribution of the spotlights is crucial for complete room lighting. Ideally, around 100-150 lumens are available per square metre of room. The distance between spots should usually be around 1 to 1.5 metres, depending on the room height and beam angle.
)
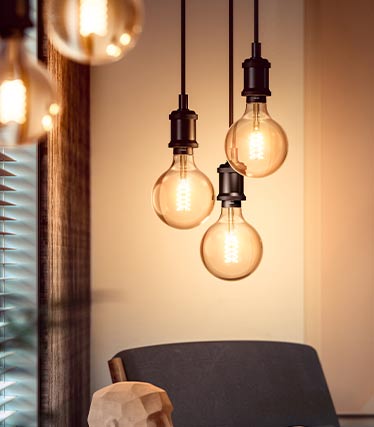
LED spotlights can be used to create different lighting zones or to emphasise certain areas of the room. For example, the individual spotlights can be aimed precisely at pictures, sideboards, desks, shelves or similar room elements.
)
The right beam angle ensures that the light actually reaches where it is needed or desired. Lighting with recessed spotlights is suitable for making really every corner bright. Many models can be precisely aligned even after installation.
)
In terms of light colour, the choice is between warm white (<3,300 K) for feel-good areas and universal white (3,300-5,300 K) for more functional task lighting, for example in the kitchen. If you want to remain flexible, choose recessed spotlights with adjustable light colour: with a so-called CCT function.
Installing recessed spotlights
Preparing the ceiling and making openingsLED spotlights are installed correctly by creating the appropriate cut-outs according to the hole dimensions, preparing the cabling and connecting the spotlights. The clamps are then pressed together, the light is inserted into the opening and pressed in, holding it securely in place. Old ceiling spots with clips are removed by pressing the spring clips together, pulling out the spot and then reinserting the new spot.
Use symmetrical lines or grids and maintain a minimum distance from the wall (approx. 50-100 cm).
The cut-out must match the spot exactly. Mill out the holes cleanly or use a drill bit. Typical diameters are between 50-200 mm.
Allow for sufficient cable length and position the driver in the cavity so that it can be reached later. The required installation depth should always be checked against the manufacturer's specifications.
Wiring recessed ceiling lights
Correctly categorise 12 V and 230 V)
LED spotlights with 12 V operating voltage require a transformer. A 12 V system is relevant, among other things, in the critical protected areas of the bathroom, whereby the driver itself must be placed outside these protected areas.
)
230 V spotlights are connected directly to the 230 V mains supply and therefore do not require a separate driver. However, certain areas of damp rooms are not authorised for the use of 230 V systems.
Basic principle of parallel connection: Several LED spotlights are almost always connected in parallel. The advantage of this is that if one spot fails, the others remain switched on, as voltage is applied to each consumer.
Connecting LED spots
Explained step by step)
The qualified electrician will carry out the following steps to safely install the selected LED spotlights.
- Switch off the circuit
- Check that there is no voltage
- Protect against restarting
- Prepare cable (strip insulation)
- Connecting cables with terminals
- Position the driver correctly
- Perform function test
- Insert spotlight
Avoid common mistakes: To ensure that lighting with LED spotlights works in the long term, you should avoid the following:
- Installation depth too shallow
- Overheating due to poor ventilation or crushed driver
- Incorrect degree of protection in damp rooms or covered outdoor areas
- Poor accessibility of the technology


 "IP protection classes")
 "Lighting design for bathrooms")
 "Large ceiling chandelier guide")
 "Indirect lighting")
 "Brighten up dark rooms")
 "Small rooms")